Using Zoom
For all our online offerings, we are using the Zoom platform. Zoom is an online video conferencing service, and you do not need your own account to take part in our Zoom sessions.
When clicking on a meeting link, you will be prompted to download the Zoom Launcher or an app, depending on what type of device you are using. Please see the section below for further guidance on using the platform: Using Zoom for the first time.
To use Zoom, you will need:
- A reasonable internet connection to stream live video
- Speakers or headphones
- And ideally a camera and microphone
Most laptops, and all tablets/ipads and smart phones will have these as standard.
On a desktop or laptop PC
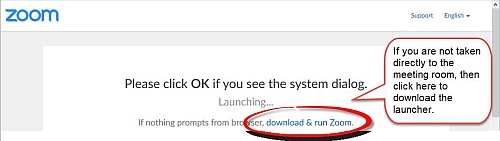
When clicking on the link, you will be prompted to download the Zoom Launcher, a bit of software which will run the session on your PC.
Web browsers (google chrome, firefox, safari etc) handle downloads differently and where the file is put will be dependent on your settings.
Zoom provides handy orange arrows telling you where to click next to access the file. If the download doesn’t start (or if you are unsure) click on the download and run zoom from the dialog box.

 Once downloaded, click on the file to open it and the launcher will install.
Click on Join with Computer Audio. You can also here, test your speaker and microphone before joining.
On a mobile device (tablet/ipad/smart phone)

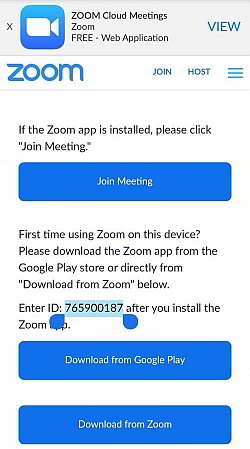 From clicking on the link from the Gaia House website, you will be promped to download the app first. (Zoom Cloud Meetings, zoom.us – please note there is a separate app for Blackberry devices)
The meeting Id is half way down the screen, make a note of this, or press on the meeting ID to select it and choose Copy.
Click on what you would like to use to download the app and you will be taken to that site.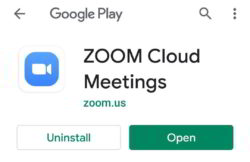
Open the App (I used Google Play).
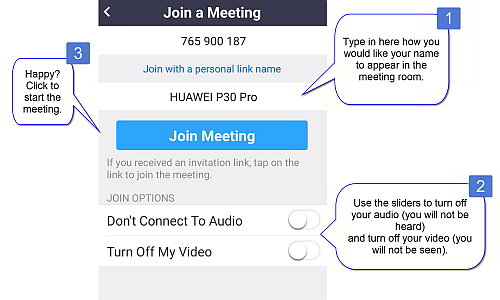 Type in the meeting ID at the top (or hold and paste if you copied the ID earlier).
1. Type in your name, how you would like it to appear in the meeting room.
2. Choose whether you would like to turn off your video and microphone as you enter the room.
3. Press the Join Meeting button to enter into the room.
Once you have joined the room, you will either see others in the room or you may told that the meeting has not started yet and to wait until your host (the teacher) has joined.
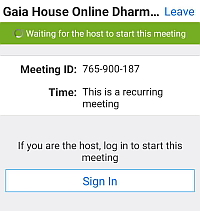
You may be faced with the following screens: This just means that the host (teacher) has not yet started the session, so you may wait or leave the meeting to return nearer the time of the sitting.

Desktop Screenshot
Mobile screenshot
Connecting by Phone
If your internet connection is unstable you may prefer to connect to our online offerings by a phone call. Your phone service provider will calculate and issue all charges if you decide to use a phone number. Using a dial-in number for your country will be treated as a regular phone call. If you choose to use a dial-in number outside of your country it will be treated as a long distance call. To find the phone number to use for your current location please click here.
Once dialed you will be asked for the Meeting ID followed by hash (#) and then hash (#) again. At this point if the teacher has started the session you will enter the meeting room.
Additional Features and Troubleshooting
Once in the meeting room there are various options available to you from the toolbar. To access the Zoom toolbar, move your mouse to the bottom on the screen and the toolbar will appear.

- Mute/unmute microphone – Note: It’s a good idea to keep your mic muted unless you are purposely talking to the group.
- Start/stop video
- Reveal the Participate panel (side panel). You can view those in the meeting and raise your hand if you require help or have a question.
- Reveal the chat panel – Ask questions, inform the tech support that you have a problem.
Communicating during a session
The teacher will mute your microphone at the start of the session, this is to reduce the background noise during the talk or meditation. If you have a problem or wish to communicate with the teacher, you can use the chat window, by either typing a message or by raising your hand.
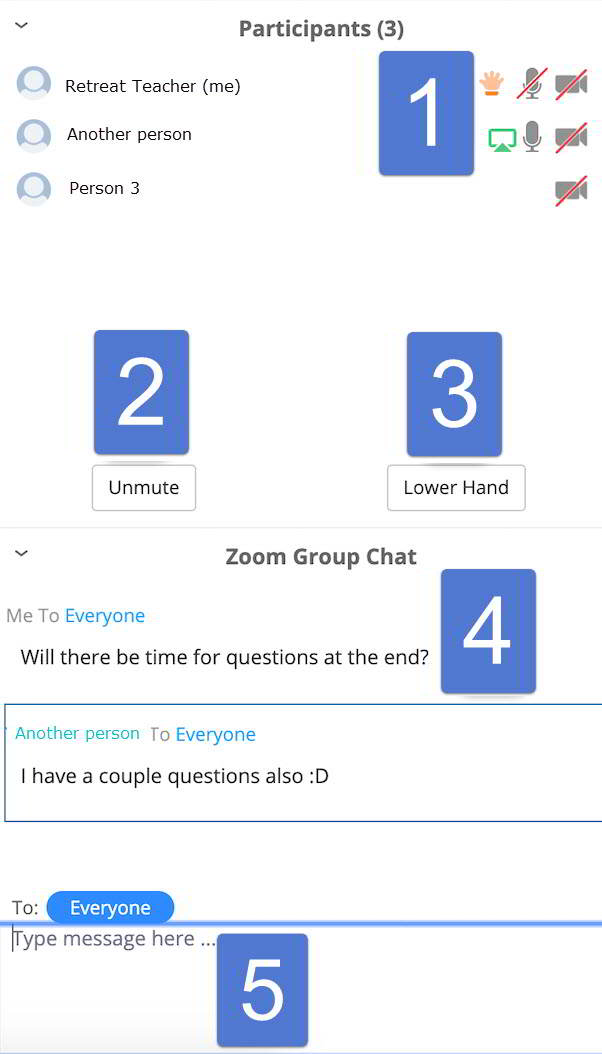
Access the Zoom toolbar by moving your mouse to the bottom of the screen and click on Participants (number 3 as shown above).
The side panel opens (normally on the right hand side of the screen, or it could be floating).
The side panel shows the Participant panel and Chat panel.
-
-
-
-
-
-
-
-
- Participant panel – (shown at the top) gives a list of participants and their status, such as whether their audio/video is on or off, who has “raised their hand”, and who is sharing their screen.
- Mute/Unmute your microphone
- Raise/Lower your hand to get the host’s attention
- Chat panel scrolling chat log
- Chat field for entering chat. Chat can be viewed by “Everyone” if you haven’t picked a specific person from the list.
-
-
-
-
-
-
-
Gallery View
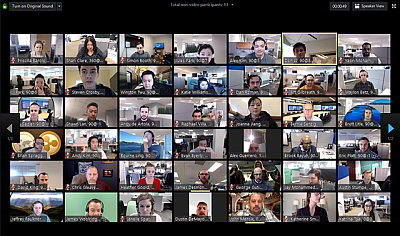 When entering the meeting room, you will be able to see the video feed of others in the room, as more people arrive they will appear in small boxes on the screen. This view is called Gallery view. If there are more than 49 partipants, there will be arrows on the side to move between the screens of participants.
The person talking is indicated by a green outline around their box.
Speaker View
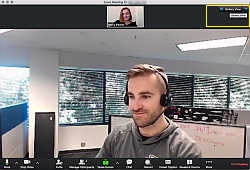 The active speaker is shown on the main screen and the other participants will be shown above the main image.
To switch the view, use the Speaker or Gallery toggle icon at the top right of the screen.![]()
Adding your pronouns within a Zoom meeting
You may add your pronouns to appear in meetings if you have downloaded the Zoom app.
To do this:
- Sign in to the Zoom web portal.
- In the navigation panel, click on Profile.
- On the right side of your name, click Edit.
- In the Pronouns field, enter your pronouns.
- In the How would you like to share your pronouns? drop-down field, choose from the following options:
- Always share in meetings and webinars: Your pronouns will appear next to your display name automatically in any meetings that you host or join, and any webinars that you’re the host or panelist for.
- Ask me every time after joining meetings and webinars: You will be asked if you want your pronouns to appear next to your display name in every meeting that you host or join, and any webinars that you’re the host or panelist for.
- Do not share in meetings and webinars: Your pronouns will not appear next to your display name in any meetings or webinars. You will have to manually choose to share your pronouns.
Note: Even if you choose not to share your pronouns in meetings or webinars, your pronouns will still appear in your profile card and be visible to your Zoom contacts if you have entered them in the Pronouns field.
- Click Save.
At any point in a meeting you can choose if you want to share or unshare your pronouns.
- In the meeting controls toolbar, click Participants.

- Hover over your name, then click More.
- Click Share My Pronouns.
Your pronouns will appear next to your display name in your participant video or thumbnail and next to your display name in the Participants list.
Alternatively, you can hover over your video thumbnail, click ![]() in the top-right corner, then click Share My Pronouns.
in the top-right corner, then click Share My Pronouns.
Link and password for the Online Dharma Hall
If you are using the link, the password is not needed but if you are already a Zoom user and are joining the meeting through the Zoom app or by phone the password is required.